Requirements
Introduction
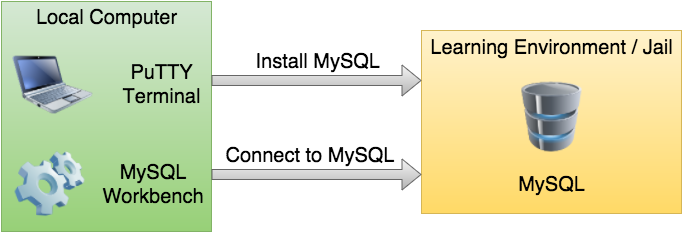
MySQL is a popular open source database and this tutorial explains what steps are necessary to install it. MySQL is often used in conjunction with the MySQL Workbench. It is important to point out that MySQL has to be installed in your learning environment and the MySQL Workbench has to be installed on your local computer. The two-step procedure to set this up is shown in the figure below. First, you have to use PuTTY or the Terminal to install and configure MySQL, which is the topic of this tutorial. Second, you have to use the MySQL Workbench to create a connection to MySQL, which is covered in the MySQL Workbench Tutorial.
Installation
After connecting with PuTTY or the Terminal to your environment (see setting up your environment) then run
sudo pkg install mysql56-server
Configuration
First we have to enable and start MySQL by running these two commands:
sudo sysrc mysql_enable=YES
sudo service mysql-server start
Next, we will secure your installation by setting a root password. First connect:
mysql -u root
After connecting the prompt will change to mysql>. It is now possible to run SQL queries. To change the root password run (make sure to insert your own new password)
mysql> UPDATE mysql.user
       SET Password = PASSWORD('replace_with_new_root_password')
       WHERE User = 'root';
mysql> FLUSH PRIVILEGES;
You should enter (copy) this information line-by-line (press enter after each line) otherwise it won’t work.
Note: You should pick a password that is hard to guess and you do not use anywhere else!
The next step is to removed unused users (make sure to insert your own username, e.g., in my case that would be mvoortman)
mysql> DROP USER ''@'localhost';
mysql> DROP USER ''@'replace_with_your_username';
mysql> FLUSH PRIVILEGES;
The next step is to enable remote logins (make sure to replace with your own password) in order to be able to connect from the MySQL Workbench:
mysql> GRANT ALL PRIVILEGES ON *.* TO 'root'@'%'
       IDENTIFIED BY 'replace_with_your_root_password'
       WITH GRANT OPTION;
mysql> FLUSH PRIVILEGES;
mysql> exit
Again, make sure to enter (copy) the commands above line-by-line. exit on the last line leaves the mysql program and returns to the shell prompt. You can now continue with the MySQL Workbench.
How To Tutorial Videos
Database Video Tutorials:
SQL Video Tutorials.